


Mesh Transformation [PRO/EX]
Allows you to create guides and handles by dividing a selected area with a lattice to transform an image by portions by dragging the corresponding lattice point.
|
|
Layers that support [Mesh Transformation] include Raster layers, Vector layers, Layer Masks, and Selection layers. |
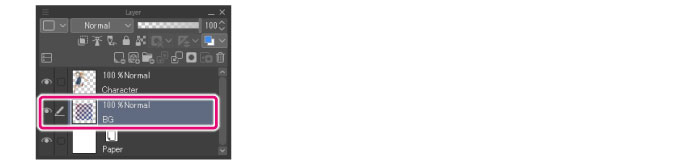
1On the [Layer] palette, select the layer you want to transform.
|
|
·Selecting multiple layers transforms all of the selected layers. ·To change the Layer Mask only, you must unlink the Layer and the Layer Mask. For details, see "Link Mask to Layer". |
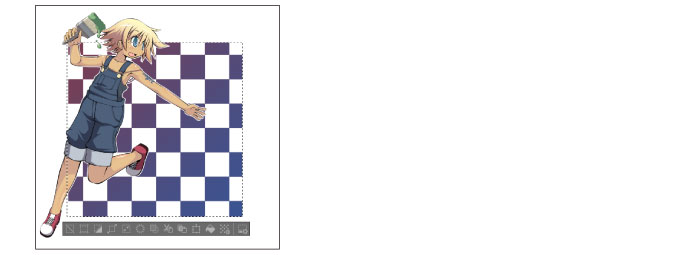
2Using a selection tool, create a selection.
|
|
If there is no selection area, the entire drawn area of the selected layer will be the target of the transformation. |
3Select the [Edit] menu > [Transform] > [Mesh Transformation].
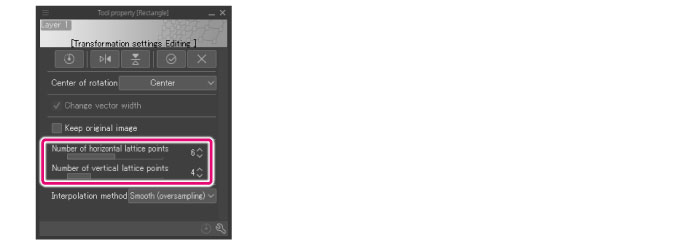
4On the [Tool Property] palette, set the number of lattice points (handles).
|
|
You can set up to 10 lattice points. |
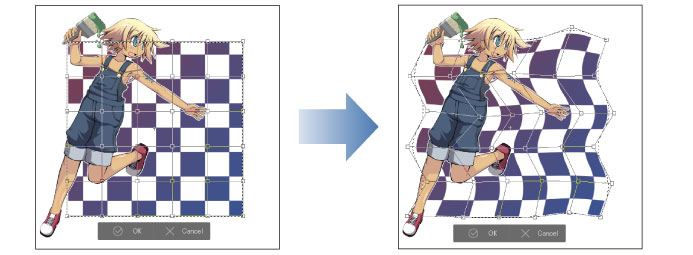
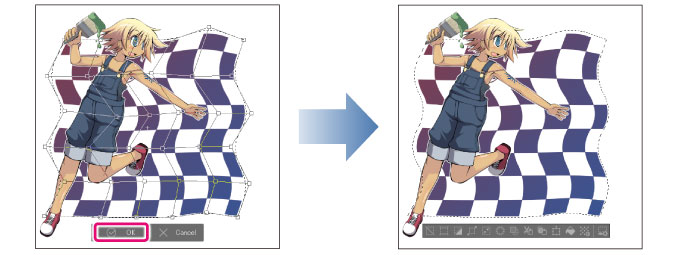
5As many lattices as you set will show in the selected area of the image. Transform by dragging the bounding box or handles.
|
|
Hold down Shift while dragging a handle to move the handle horizontally, vertically or 45° diagonally. |
6Click [Confirm] on the launcher below the bounding box to apply the transformation.
|
|
·Double click on areas other than the handles inside the guides to confirm the transformation. ·Pressing Enter also applies the transformation. ·Pressing Esc before confirming the transformation cancels it. ·If the [Transform launcher] does not appear, select [View] > [Object Launcher]. |
Tool property palette settings
[Mesh Transformation] becomes and item in the [Tool Property] Palette when you are using it.

|
|
If the transformation is recorded in an auto action, [Auto action settings] will be shown in the [Tool Property] palette. For details on the setting items, see the description of "Transformation settings" in "CLIP STUDIO PAINT Tool Setting Guide". |
(1) Reset transformation
Restores the image to the original state before transforming.
(2) Flip horizontal
Flips the image horizontally around the center.
(3) Flip vertical
Flips the image vertically around the center.
(4) OK
Applies the transformation.
(5) Cancel
Cancels the transformation.
(6) Center of rotation
Specifies the center of the image transformation.
You can select from [Center], [Top left], [Top right], [Bottom right], [Bottom left], [Top], [Left], [Right], [Bottom], and [Free position].
(7) Change vector width
If turned on while scaling a vector layer, the line width changes in accordance with the transformation.
(8) Keep original image
When turned on, the original image can be kept when moving or transforming.
(9) Number of horizontal lattice points
Specifies the number of horizontal lattice points.
(10) Number of vertical lattice points
Specifies the number of vertical lattice points.
(11) Interpolation method
Select how the colors of surrounding pixels will blend when the image is transformed.
|
Smooth (oversampling) |
Each pixel is divided into multiple pixels and calculated as an average of the original pixel colors before transformation. This method makes outlines smoother, but may take a long time to process. |
|
Hard edges (nearest neighbor) |
The outline of the color separation borders are blended with the color of the adjacent pixels and smoothed. However, white noise may appear around the outline depending on the content being transformed. |