


Exporting in Kindle format [Windows]
Works created in Clip Studio Paint can be exported in Kindle format.
|
|
If [Export in Kindle format] is performed twice or more for the same work, the first data is overwritten with the second data. Also, if files unrelated to the exported data have been added to the export destination folder, these files may be deleted. |
|
|
The command is not available when [Webtoon] is selected from [New] > [Use of work]. Please select [Story] > [View] > [Page-by-page], and set [Binding point] and [Start page] before running the function. |
1Select the [File] menu > [Export multiple pages] > [Export in Kindle format].
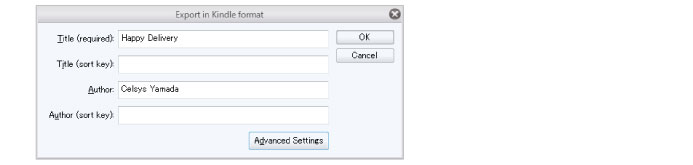
2In the [Export in Kindle format] dialog box, enter information such as [Title] and [Author] and click [OK].
3The following message will appear when the export is complete.

·Select [Proceed to Kindle Direct Publishing (KDP)] to open your web browser and connect to the Kindle Direct Publishing web page. The exported data can be published to the Amazon Kindle store from here.
·Select [Check exported data] to launch Clip Studio and check the exported data.
|
|
·For information on how to publish the exported data to the Amazon Kindle store, see the Kindle Direct Publishing Web page. ·You can view the folder containing the data exported in Kindle Format from the [File] menu > [Export multiple pages] > [Open export destination of Kindle format]. ·The exported Kindle format data can be checked in Clip Studio. For details, see the Help section in Clip Studio. ·If the exported data needs to be adjusted, select the [File] menu > [Export multiple pages] > [Export settings for Kindle format], adjust settings such as the size and quality of the images to be exported, then export the data again. For details, see "Export settings for Kindle format [Windows]". |
[Export in Kindle format] Dialog Box
Set up information to be included as metadata in Kindle format.
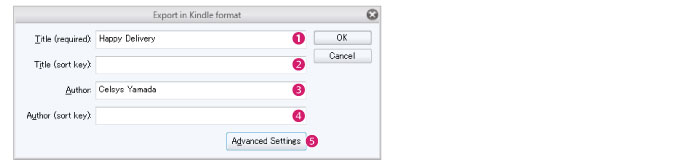
(1) Title
Enter the e-book title to be registered as metadata in Kindle format. This is a required item.
(2) Title (sort key)
When using Japanese kanji characters, you can enter the pronunciation in full-width katakana characters for sorting by title.
(3) Author
Enter the e-book author to be registered as metadata in Kindle format.
(4) Author (sort key)
When using Japanese kanji characters, you can enter the pronunciation in full-width katakana characters for sorting by author name.
(5) Advanced Settings
Opens the [Advanced Settings for Kindle] dialog box. Here you can edit detailed information such as [Publisher] and [Date modified]. For details, see "[Advanced settings for Kindle] Dialog Box".
[Advanced settings for Kindle] Dialog Box
Configure settings for the Kindle format data, such as items to be registered as metadata and whether a back cover page is included.
|
|
If no changes need to be made in the [Advanced Settings for Kindle] dialog box, you can use the settings that appear. |
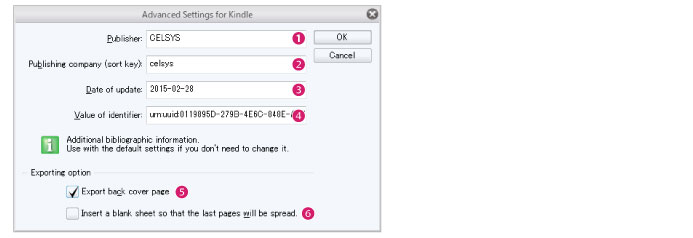
(1) Publisher
Enter the publisher to be registered as metadata in Kindle format.
(2) Publishing company (sort key)
When using Japanese kanji characters, you can enter the pronunciation in full-width katakana characters for sorting by publisher name.
(3) Date modified
Enter the date of update (creation date) of the book to be registered as metadata in Kindle format. The date of exporting the Kindle format data will be pre-entered.
(4) Value of identifier
Displays the book ID to be registered as metadata in Kindle format.
(5) Export back cover page
Turn this on to export the back cover page when exporting a work with a cover page and back cover page.
(6) Insert a blank page so the last pages will be a two-page spread.
If the last page is a single page, turn this on to insert a blank page to display as a two-page spread.