


Batch import [EX]
You can select multiple image files and import them to each page file as a layer.
You can import the following file formats: BMP, JPEG, PNG, TIFF, Targa, Adobe Photoshop Document (extension: psd), and Adobe Photoshop Big Document (extension: psb).
1Create a page file for importing image files, or open an existing page file.
|
|
·For details on how to create a page file, see "Creating a Multi-Page File". ·You can use [Batch import] when a single page file is open. In this case, the [Create story folder] dialog box will open after you specify the page from which to start importing. You will need to create a story folder in this dialog box. |
2Select the [File] menu > [Import] > [Batch import].
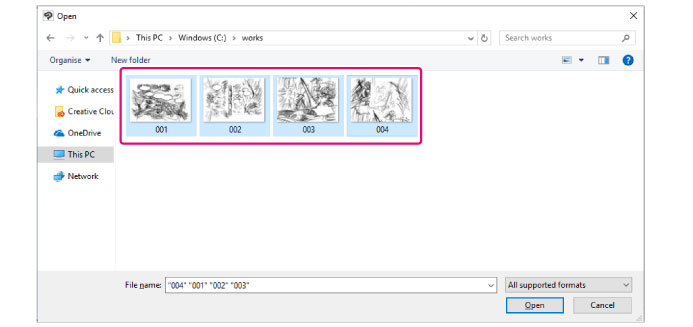
3The [Open file] dialog box will open. Specify the image to import.
|
|
Image files can be imported even when the number of image files exceeds the number of pages. The images will be added to new pages created automatically. |
4The [Batch import] dialog box opens. The canvas will show a preview of the image on the start page. Specify the orientation, size, and position of the image on the canvas and specify the start page in the dialog box.
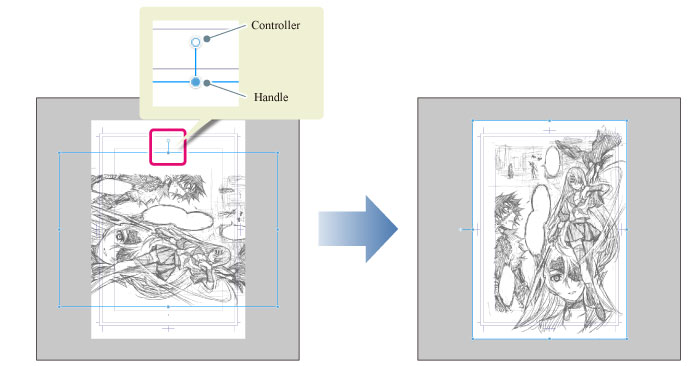
(1) Use the controller and the handles to adjust the image orientation, size, and position.
|
|
·Drag the controller to rotate the image. ·Drag the handles to adjust the image size. ·Drag the image to adjust its position. |
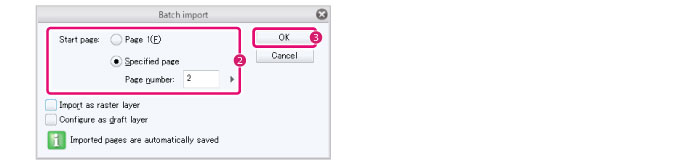
(2) Specify the first page to import in [Start page] of the [Batch Import] dialog box.
(3) Click [OK].
|
|
The [Create story folder] dialog box will open if images are batch imported when a single page file is open. You will need to create a story folder in this dialog box. For details, see "[Create story folder] Dialog Box". |
5The images are imported to each page file as specified when the dialog box is closed.

[Batch Import] Dialog Box

(1) Start page
Specify the page from which to start importing images.
·Select [Page 1] to import images from the first page.
·Select [Specified page] to import images from the page specified in [Page number].
(2) Import as raster layer
Imports the images as raster layers.
(3) Set as draft layer
Imports the images to draft layers.
[Create story folder] Dialog Box
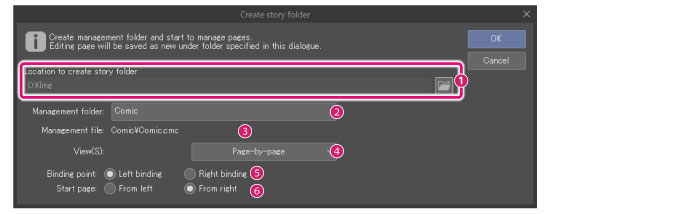
(1) Location to create story folder
Specifies the location where the management folder will be created. Click [Browse] to specify the location.
(2) Management folder
Enter a name for the management folder.
(3) Management file
Displays the management file name (extension: cmc).
(4) View *
You can choose from the following views. The settings and [Story] window will change depending on the view.
|
Page-by-page |
Pages will be optimized for works with page turns such as bound books. |
|
Webtoon |
Pages will be optimized for vertical scrolling works such as webtoons. |
(5) Binding point
Selects the direction in which to bind the book. Select either [Left binding] or [Right binding].
|
|
·Generally, [Left binding] is used for Western-style comics, and [Right binding] is used for Japanese-style manga. ·You can set it up by selecting [Page-by-page] under [View]. |
(6) Start page
Set which side to put the first page.
·When starting with a left page, select [From left].
·When starting with a right page, select [From right].
|
|
You can set it up by selecting [Page-by-page] under [View]. |