


Continuous Scan [Windows/macOS] [EX]
Use a scanner to scan multiple images and import them as layers in separate page files.
1Create a page file for importing image files, or open an existing page file.
|
|
·For details on how to create a page file, see "Creating a Multi-Page File". ·You can use [Continuous Scan] even if a single-page file is open. In this case, the [Create story folder] dialog box will open after you specify the page from which to start importing. You will need to create a story folder in this dialog box. |
2Select the [File] menu > [Import] > [Continuous Scan].
3The scanner driver will appear. Configure the driver and scan the pages.
|
|
The scanning procedure will depend on the selected scanner. Please refer to the instruction manual of the scanner. |
4Exit the driver when the scan is complete.
5The [Continuous Scan] dialog box will open. The canvas will show a preview of the scanned image on the start page. Specify the orientation, size, and position of the image on the canvas and specify the start page in the dialog box.
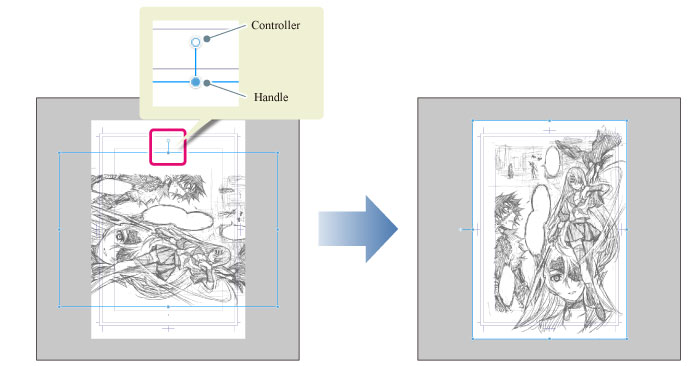
(1) Use the controller and handles to adjust the image orientation, size, and position.
|
|
·Drag the controller to rotate the image. ·Drag the handles to adjust the image size. ·Drag the image to adjust its position. |

(2) Specify the start page to import in the [Continuous Scan] dialog box.
(3) Click [OK].
|
|
The [Create story folder] dialog box will open if images are batch imported when a single page file is open. You will need to create a story folder in this dialog box. For details, see "[Create story folder] Dialog Box". |
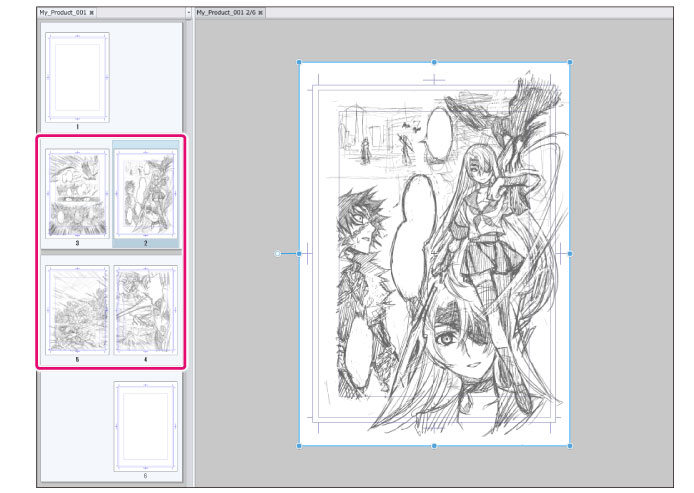
6The images are imported to each page file as specified when the dialog box is closed.
[Continuous scan] Dialog Box

(1) Start page
Specify the page from which to start importing images.
·Select [Page 1] to import images from the first page.
·Select [Specified page] to import images from the page specified in [Page number].
(2) Import as raster layer
Imports the images as raster layers.
(3) Set as draft layer
Imports the images to draft layers.
[Create story folder] Dialog Box
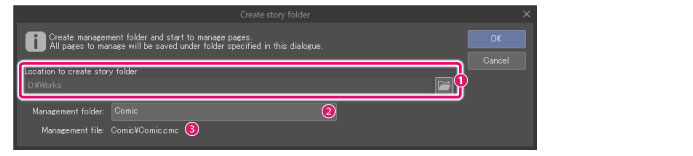
(1) Save folder
Specifies the location where the management folder will be created. Click [Browse] to specify the location.
(2) Management folder
Enter a name for the management folder.
(3) Management file
Displays the management file name (extension: cmc).