


Accessories
This section explains how to import accessory files.
The following file formats can be imported.
|
File formats that can be imported |
fbx |
1Select the file to be imported
Files are imported in the [Character configuration] palette.

(1) Select [Accessories] from the group on the [Character configuration] palette.
(2) Click [Add from file].
(3) When the dialog box for opening a file is displayed, select the file to be imported and click [Open].
2The file is imported
The selected file is imported in CLIP STUDIO MODELER.
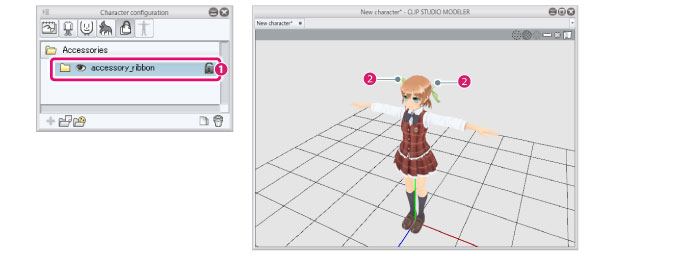
(1) An [Accessory parts folder] is displayed for the imported file under [Accessories].
(2) The imported accessory is displayed in the [Document] window.
3Adjust the position and size of the accessory
Adjust the position and size of the accessory relative to the character.
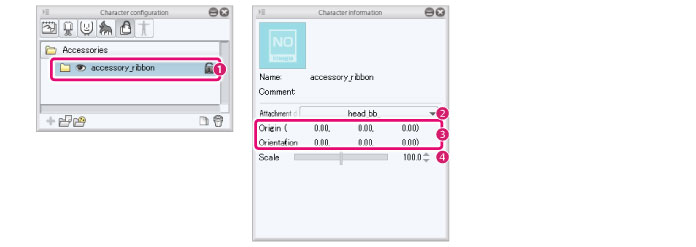
(1) Select the [Accessory parts folder] from the group on the [Character configuration] palette.
(2) Select the bone where you want to attach the accessory from [Attachment destination] in the group on the [Character information] palette.
(3) Adjust the [Origin] and [Orientation] values in the [Character information] palette to change the position and angle of the accessory.
(4) Adjust [Scale] in the [Character information] palette to change the size of the accessory.
|
|
The position of accessory parts can also be adjusted using the [Move parts] sub tool. For details, see "Move parts" . |