


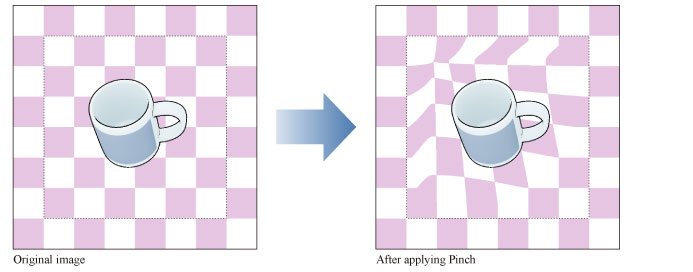
Pinch
Select the layer you want to apply a filter to, then select the [Filter] menu > [Distort] > [Pinch] to open the dialog box. This distorts the image on the layer by pinching it in toward a specified center point.
|
Applicable layers |
Raster layer (color) Raster layer (gray) Raster layer (monochrome) |
|
|
·To learn how to apply a [Distort] effect to a layer, see "Using the Distort Filters". ·If you create a selection area, the effect will only be applied to the selection area. You cannot change the size of the effect after applying the filter. ·For information on the settings in the [Pinch] dialog box, please see the following section. |
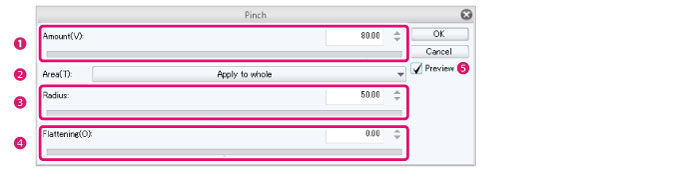
[Pinch] Dialog Box
|
|
A red cross (X) will appear on the canvas while the dialog box is open. Drag this to set the center of the distortion. |
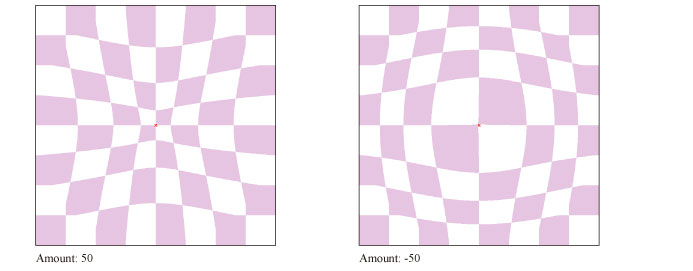
(1) Strength
The degree of pinching to apply to the image.
·Set a positive number to pinch the image toward the viewer.
·Set a negative number to pinch the image away from the viewer.
(2) Area
Specify the range in which to apply the transformation effect.
|
Entire selection |
Applies the transformation effect to the entire image. |
|
Specify size (use radius/shape) |
Specifies the range and vertical/horizontal ratio of the transformation effect. Specify the range and vertical/horizontal ratio using the [Radius] and [Shape] settings. |
(3) Radius
Set the range of the image distortion.
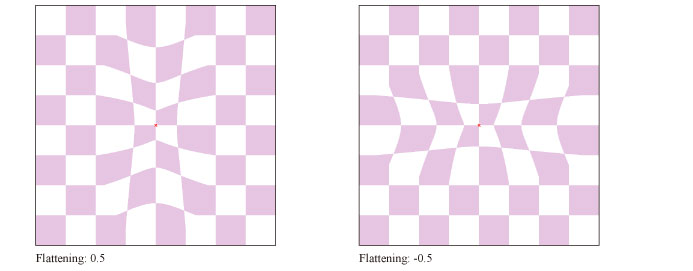
(4) Shape
Set the vertical/horizontal ratio of the area to distort the image.
·Set a positive number to make the transformation range narrower horizontally.
·Set a negative number to make the transformation range narrower vertically.
(5) Preview
Turn this on to preview the results on the canvas.