


Change basic work settings Dialog Box (Animation)
Displayed when [Animation] is selected for [Use of work] in the [New] dialog box. This allows you to change settings related to animation works.
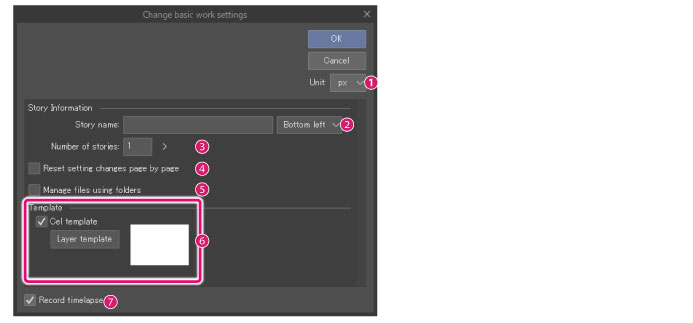
(1) Unit
Select a unit for the width and height. You can choose from centimeters, millimeters, inches, pixels, or points.
(2) Story name
Enter a name for the story. The pull down menu shows options for where to place the story name. This information is displayed in the blank space.
(3) Number of stories
Enter the number of stories.
(4) Reset setting changes page by page
Turn this on to stop adjustments made to one page, such as frame sizes and the story information position, from being applied to all the other pages.
(5) Manage files using folders
Turn this on to manage multiple files in folders. Click [OK] in the [Change basic work settings] dialog to display the [Create story folder] dialog and create a folder for managing files.
|
|
For details on the [Create story folder] dialog box, see "Batch import [EX]". |
(6) Cel template
Click this to open the [Template] dialog, where you can select a template (layer configuration) for cels. Cel templates are applied when a cel is created by selecting [Animation] > [New animation cel]. If a template is already being used, you can open the [Template] dialog by clicking the template name button.
(7) Record timelapse *
When enabled, you can start recording a timelapse. If you save the file in Clip Studio format (extension: .clip), the timelapse will be saved with the file. For more detail on timelapses, see Clip Studio TIPS.