


Adding a Command
Follow these steps to add an icon to the Command Bar.
1Select the [File] menu > [Command Bar Settings]. The [Command Bar Settings] dialog box will open.
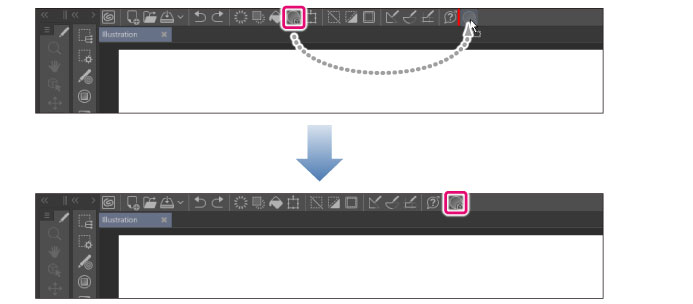
2On the Command Bar, click the icon at the position you want to add a new command.

|
|
The new command icon will be added to the right of the selected icon. |
3In the [Command Bar Settings] dialog box, set the following.
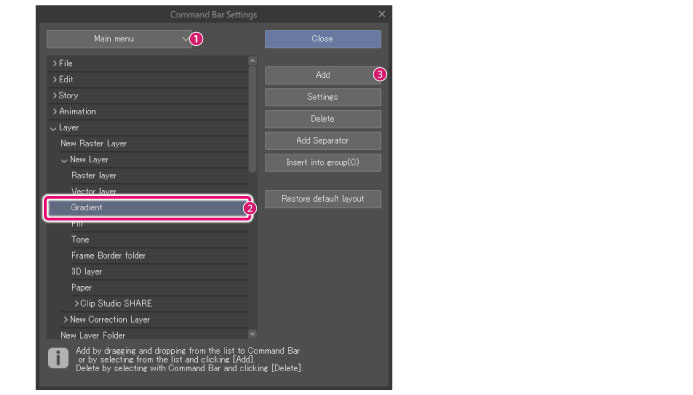
(1) Select the type of icon (function) to add.
(2) From the list that appears, select the function to add to the Command Bar.
(3) Click [Add].
4The icon will be added to the Command Bar.

|
|
You can also drag and drop items from the list to add them to the Command Bar. |
You can move icons by dragging and dropping them on the Command Bar.
|
|
Add separators and group icons using the following steps while the [Command Bar Setting] dialog box is open. ·Click the Command Bar icon and click [Add Separator] to add a separator to the right side of the icon. ·When dragging and dropping an icon from the Command Bar on the separator or to the right end/left end of the Command Bar, a separator will be created at that position. ·You can group icons by dragging and dropping them onto other icons on the Command Bar. |
5Close the [Command Bar Settings] dialog box.
|
|
You can drag and drop the following icons onto the Command Bar to add them. ·Tool icons in the [Tool] palette ·Tool icons and sub tool groups in the [Sub Tool] palette ·Auto actions in the [Auto Action] palette
You can add the following functions to the Command Bar by dragging and dropping them while holding down Ctrl. ·Icons on the selection launcher ·Icons on the [Quick Access] palette |