Operating the Auto Action
An "auto action" is the settings for recording and running operations. Once you have recorded operations in an auto action, you can automatically run the recorded operations.
Add the auto action
To add the auto action to the auto action set, proceed as follows.
1Select the auto action set
Select the auto action set to be added with an auto action from the list displayed by clicking [Switch the set].
2Add the auto action
Add the auto action to the auto action set.
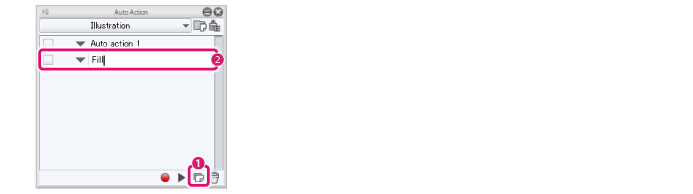
(1) Click [Add auto action].
(2) An auto action is added to the list of auto actions. Input a name for the auto action and press the Enter key.
3Record operations in the auto action
Record operations in the auto action.
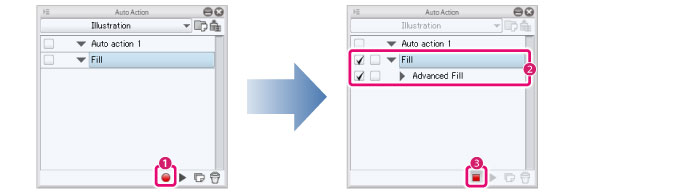
(1) Click [Start to record auto action].
(2) Perform the operations to record in the auto action. Performed operations are displayed as a list of commands in the auto action.
(3) Click [Stop to record auto action]. This ends the recording of operations.
|
|
·For tool and sub tool operations, only the movement of layers and selections can be recorded. No other operations can be recorded. Furthermore, there may be palette and menu operations that cannot be recorded. ·Clicking [Start to record auto action] again allows you to add new commands after the currently selected command. |
Run the auto action
To run an auto action and operate the canvas, proceed as follows.
|
|
By configuring a shortcut, you can run an auto action just by pressing the shortcut keys. For how to configure a shortcut, see "Shortcut Settings [Windows]". |
1Run the auto action
Select the auto action to run, and run.
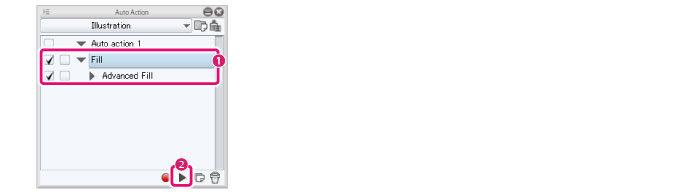
(1) Select the auto action to run.
(2) Click [Play auto action].
|
|
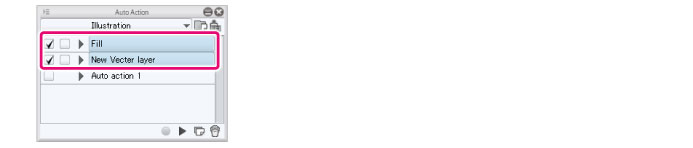
·When a certain command within the auto action is selected, operations from the selected command onwards are run. ·You can also run an auto action by double clicking its name. ·Commands whose [Run switch] are turned off are not run. |
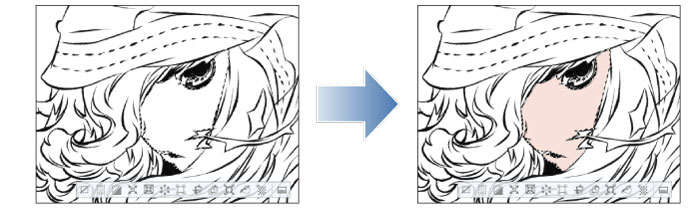
2The auto action is run
The auto action runs on the canvas.
Changing the order of auto actions and commands
The order in which auto actions are displayed and the order in which commands are run can be changed by drag and drop. The following example changes the display order of the auto action, as an example.
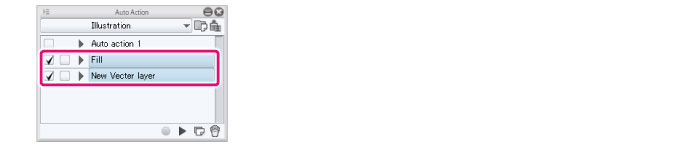
1Select the auto action
On the Auto Action palette, select the auto action whose display order you want to change.
|
|
·Clicking auto actions and commands while holding down Ctrl allows you to select multiple auto actions and commands. ·Clicking auto actions and commands while holding down Shift allows you to select multiple consecutive auto actions and commands. ·In the case of commands, only multiple commands within the same auto action can be selected. |
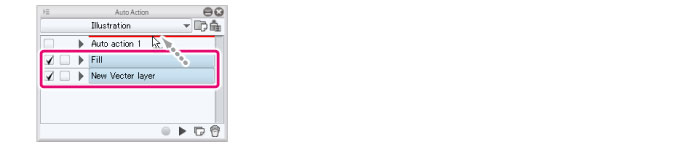
2Move the auto action
Drag and drop the auto action to the desired position. A red line is displayed in the new position.
|
|
In the case of commands, they can be moved to other auto actions. A red line is displayed at the destination of the auto action. |
3The change in the order of auto actions is complete
The auto action moves to the dragged and dropped position.