


Editing Textures in CLIP STUDIO PAINT
If both CLIP STUDIO PAINT and CLIP STUDIO MODELER are installed on your computer, you can start CLIP STUDIO PAINT and edit textures there.
[Surface material] items in [Surface material information] and [Texture] items in [Additional texture] can be edited in this way.
|
|
If you want to keep the original texture, select the [Parts folder] in the [Character configuration] palette and click [Duplicate node]. The [Parts folder] containing the original texture is duplicated. |
1Select a texture
Select the texture to be edited from the [Character configuration] palette.
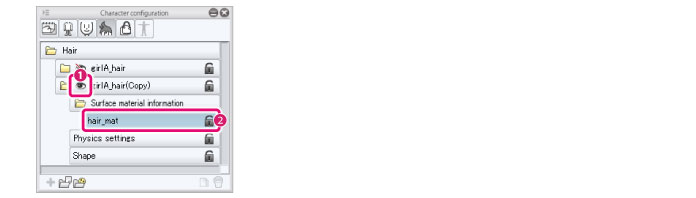
(1) Display the [Parts folder] containing the texture to be exported in the [List].
(2) Select the texture to be changed.
2Start CLIP STUDIO PAINT
Click [Edit in PAINT] in the [Character information] palette.

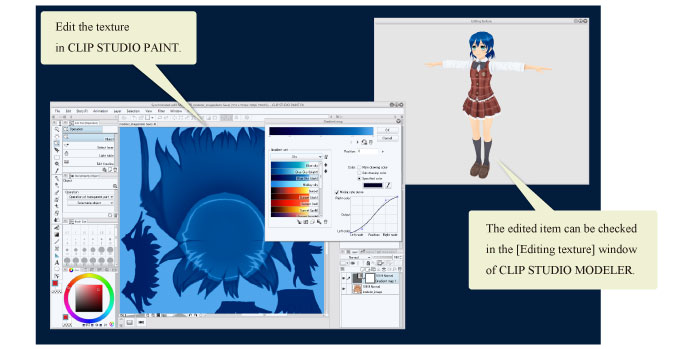
3Edit in CLIP STUDIO PAINT
CLIP STUDIO PAINT opens in synchronized edit mode and the texture is displayed on the canvas.
The [Editing texture] window is also displayed.
When you edit a texture in CLIP STUDIO PAINT, the edits are automatically applied in the [Editing texture] window.
|
|
·For instructions on using CLIP STUDIO PAINT, see “CLIP STUDIO PAINT Instruction Manual”. ·If the edits are not applied in CLIP STUDIO PAINT, turn on [Enable Auto Save] in the [File] menu of CLIP STUDIO PAINT. ·You can also edit it using multiple layers in CLIP STUDIO PAINT, then save it with the layers integrated. |
4Exit the editing screen
Exit CLIP STUDIO PAINT or close the window of the texture being edited in CLIP STUDIO PAINT. CLIP STUDIO MODELER returns to the normal view.