


About Default Bone Mapping Mode
The default bone mapping settings mode can be displayed by selecting a [Body parts folder] in the [Character configuration] palette and clicking [Default bone mapping] in the [Character information] palette.
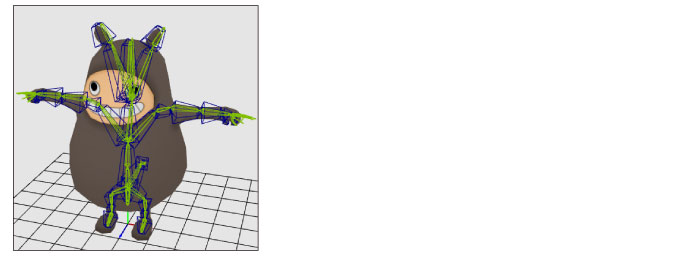
This assigns default bones that can be used in CLIP STUDIO products to 3D characters that use other bones. The 3D characters can be used in CLIP STUDIO PAINT after the default bones are assigned.
The default bone mapping settings mode is divided into the following main areas.
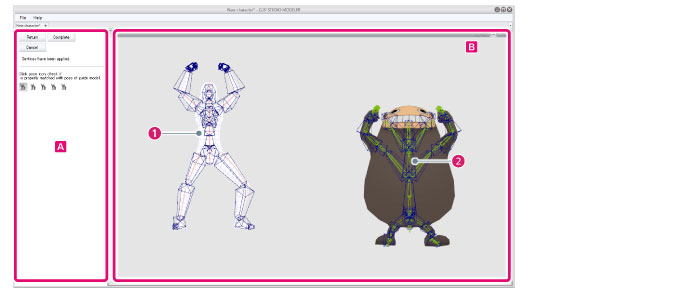
A.Navigation area
Displays settings for default bone mapping. The settings vary depending on the setting procedure.
B.Preview area
A screen for setting and checking default bone mapping.
(1) Guide model
Default bone mapping is set according to this model's bones.
(2) 3D character
The 3D character for which default bone mapping is set.