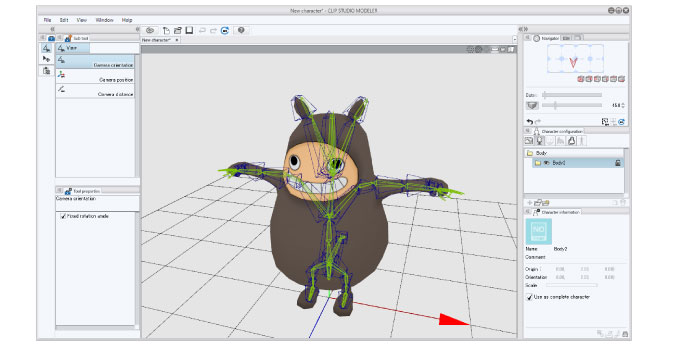
Setting Default Bone Mapping
After importing a 3D file in CLIP STUDIO MODELER, display the default bone mapping mode and set default bones.
1Select a body part
Select a [Body parts folder] from the [Character configuration] palette.
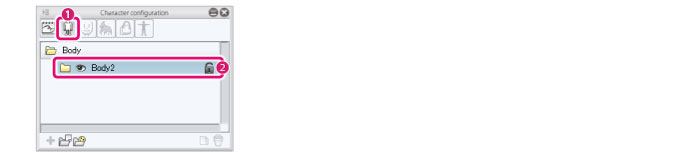
(1) Select [Body] from the group on the [Character configuration] palette.
(2) Select the body parts folder to be edited from the [List].
|
|
For information on importing a 3D file as a [Body], see "Importing 3D Materials" →"Full-body Character Data" . |
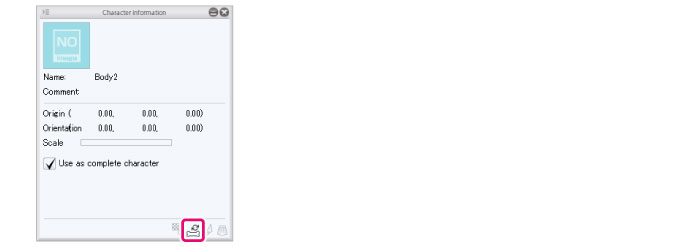
2Display default bone mapping mode
Click [Default bone mapping] in the [Character information] palette.
|
|
A message saying "You will no longer be able to edit the position, orientation or scale after performing this operation." is displayed. If you do not need to configure these settings further, click [OK]. The position, orientation and scale can be edited by configuring the settings in the [Character information] palette when the body part is selected. For details, see "Setting 3D Character Information" . |
3Adjust the angle of the arms to match the 3D character
Configure this setting while the default bone mapping mode is displayed.
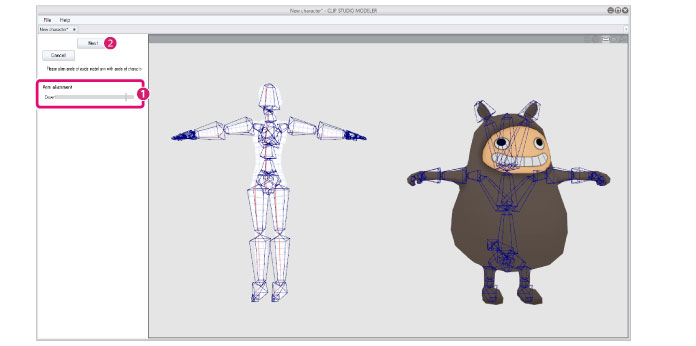
(1) Drag the slider to change the angle of the guide model's arms. Set the angle of the guide model's arms to match the arms of the 3D character.
(2) Click [Next].
4Assign the bones
Assign the default bones as the 3D character's bones.
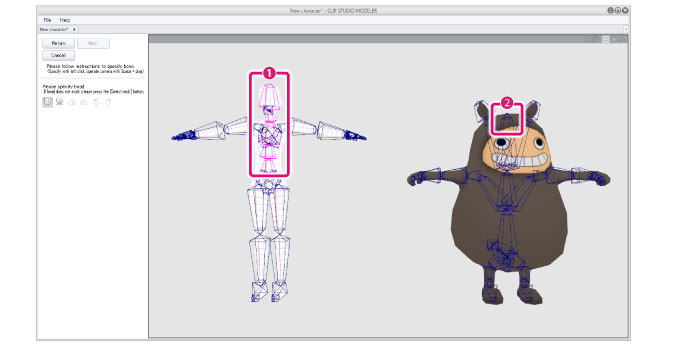
(1) Check the pink areas of the guide model's bones. These are the bone positions that will be specified for the 3D character.
(2) Click the bones of the 3D character to specify the bones.
(3) The 3D character's head bones are specified and turn pink.
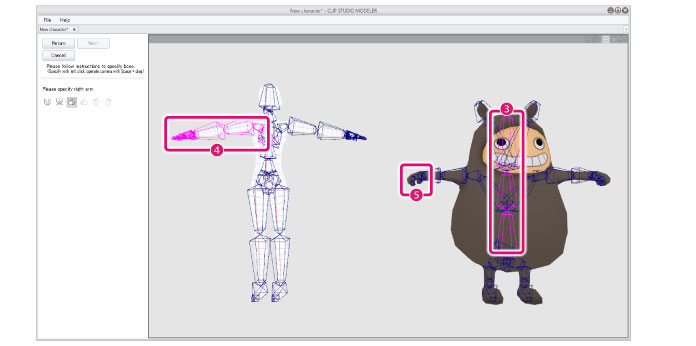
(4) The pink area of the guide model's bones switches to the next position to be specified.
(5) Repeat step (1), clicking the bones of the 3D character to specify the bones.
|
|
·For models where the head cannot be specified, such as models used for body parts, click [Select neck]. The neck position is specified in place of the head. ·If bones are specified incorrectly on the 3D character, click the button in the [Navigation area] for the area where the mistake occurred. This allows you to specify the bones again. |
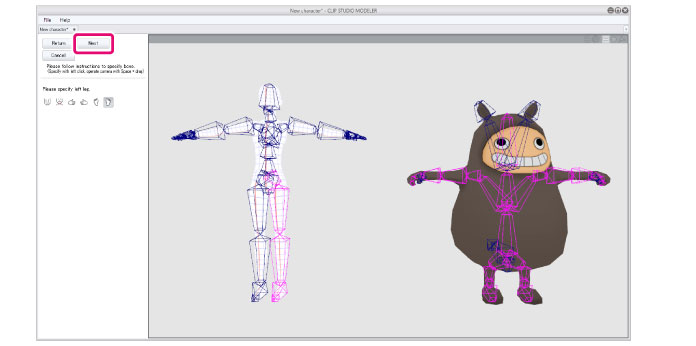
5Finish assigning the bones
When you have finished assigning all of the bones, click [Next].
6Check the mapping results
Check the default bone mapping results.
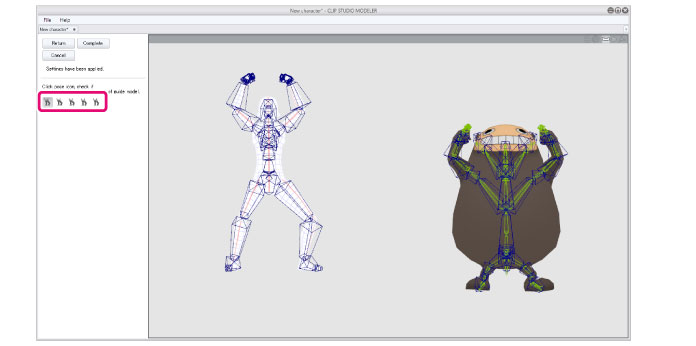
(1) Click the pose icons.
(2) Check that the pose of the 3D character is the same as the guide model.
|
|
·A different pose is assigned to each pose icon. ·It may not be possible to recreate the poses in 3D characters with an extremely different body, such as animals. ·The camera orientation can be changed by dragging in the [Preview area]. This makes it possible to check the 3D character from various angles. |
7Exit the settings mode
Click [Complete] in the [Navigation area].
|
|
To redo the settings, click [Return] to return to the previous screen. |
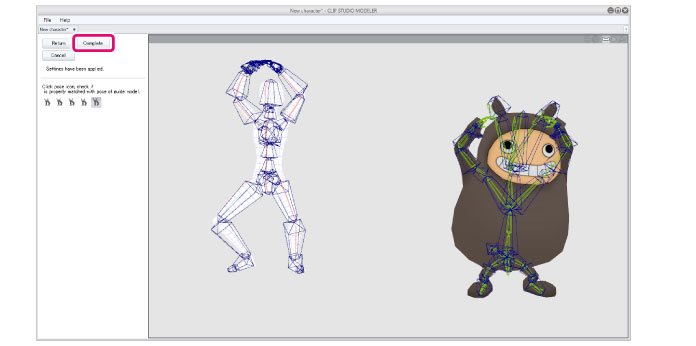
This exits the default bone mapping settings mode and returns to the 3D Character Setup screen. Default bones are assigned to the 3D character.