


Changing the Name and Information of Parts
When a part is first imported, the file name is displayed as the part name. This section describes how to change the name of parts.
|
|
Part names are displayed as 3D character material setting items in CLIP STUDIO PAINT. It is recommended that you choose a name that is easily recognizable. |
1Select the part
Select the part for which to change the name from the [Character configuration] palette.
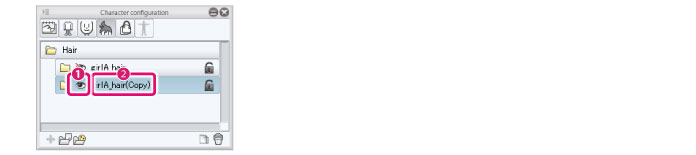
(1) Display the [Parts folder] containing the texture to be exported in the [List].
(2) Click the name of the [Parts folder] for which to change the name.
2Change the part name
Change the part name in the [Character information] palette.
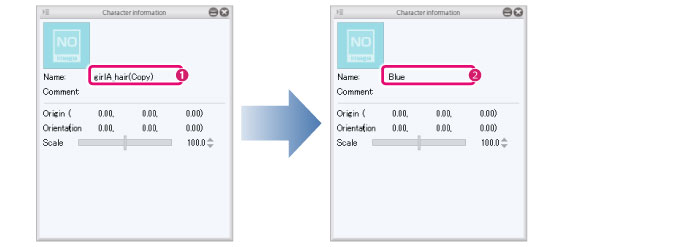
(1) Double click the part name displayed in [Name].
(2) When an input field is displayed, input the new name.
|
|
The [Comment] field on the [Character information] palette can be input in the same way as for the name. Comments are not displayed in CLIP STUDIO PAINT. |
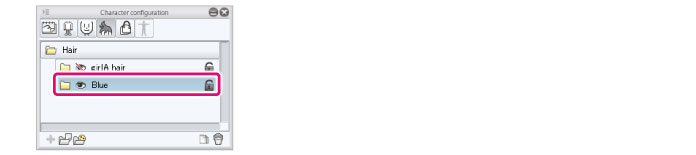
3The part name is changed
The name of the part folder on the [Character configuration] palette changes to the name input in step 2.
4Add a thumbnail
Add a thumbnail for the selected part.
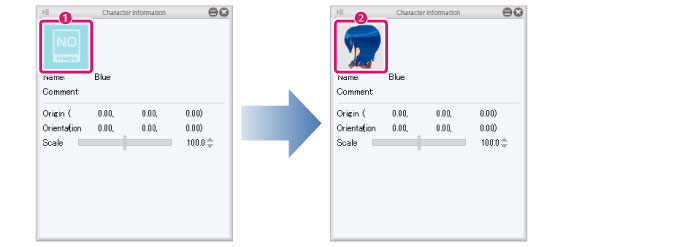
(1) Click [Thumbnail] in the [Character information] palette.
(2) Capture a thumbnail in the [Capture thumbnail] window. For information on operations in the [Capture thumbnail] window, see →"Capturing a Thumbnail" .
(3) The captured thumbnail is applied.
|
|
·You can also change the name by double clicking the part name in the [Parts folder] on the [Character configuration] palette. ·The names of a [Surface material], [Texture], etc. can be changed in the same way. |