


Layer settings
The [Layer] menu > [Layer Settings] contains commands for editing settings related to layers.
Set as reference layer
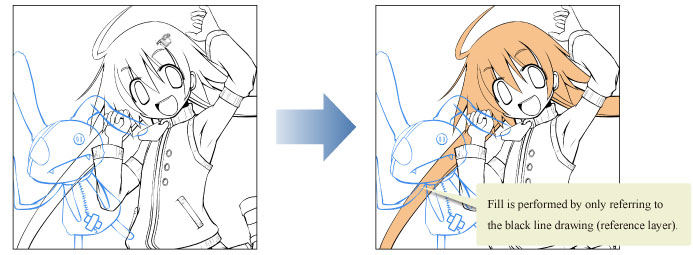
Set the selected layer as a reference layer. When you set a layer as a reference layer, you will be able to use certain tools to select and draw on a layer while referring only to this layer.
|
Tools that can use the [Reference] layer |
[Fill] tool [Auto select] tool [Shrink selection] tool [Fill] tool (Close and fill) [Fill] tool (Fill leftover areas) |
How to set as reference layer
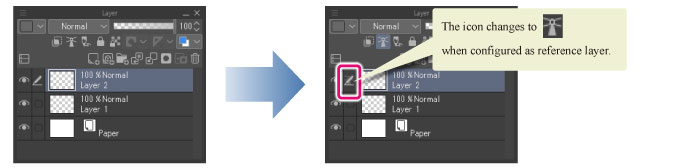
On the [Layer] palette, select the layer you want to use as a reference layer and then select [Layer] menu > [Layer Layer Settings] > [Set as Reference Layer].
The selected is set as a Reference layer. A lighthouse icon will appear in the [Layer] palette next to layers that are set as reference layers.
|
|
·Select the [Layer] menu > [Layer Settings] > [Set as Reference Layer] again to stop using the layer as a reference layer. ·You can select multiple layers and assign them as reference layers. ·A layer folder can also be set as a reference layer. |
Set as Draft Layer [PRO/EX]
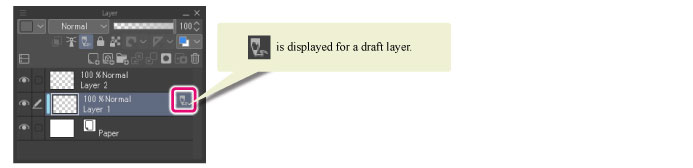
Select the [Layer] menu > [Layer Settings] > [Set as Draft Layer] to set the selected layer as a draft layer.
Draft layers can be excluded when setting references or exporting files.
·You can choose whether to include draft layers when exporting files with [File] menu > [Save Duplicate] or [Export (Single Layer)].
·You can choose whether to refer to draft layers when creating a selection or using fill tools.
|
|
·Select the [Layer] menu > [Layer Settings] > [Set as Draft Layer] again to stop using the layer as a reference layer. ·You can assign multiple layers as draft layers. ·Layer folders can also be set as draft layers. |
Clip to Layer Below
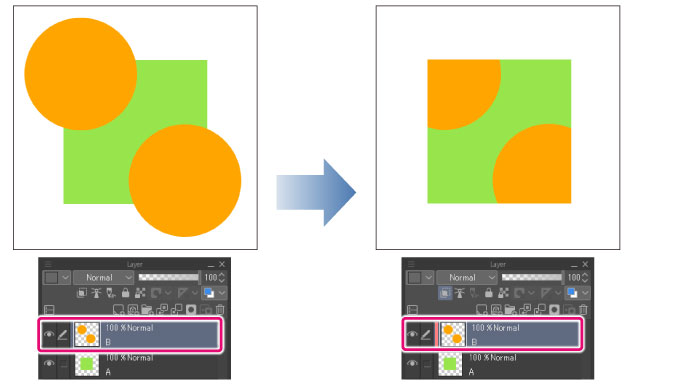
Select [Layer] menu > [Layer settings] > [Clip to Layer Below] to limit the shown area of the selected layer to the drawn parts of the layer immediately below. Any content on the clipped layer that is outside of the drawn area of the lower layer (above transparent pixels) will not be shown. This allows you to add extra details without going outside of the area of the lower layer.
Layers that are clipped to lower layers will have a green bar shown next to the layer thumbnail.
|
|
If you create a new layer below a clipped layer using any of the following methods, the created layer will also be clipped. ·Creating a new layer or folder layer ·Inserting a material from the [Material] palette ·Pasting an image ·Creating an image material layer with [File] menu > [Import] |
Lock Layer
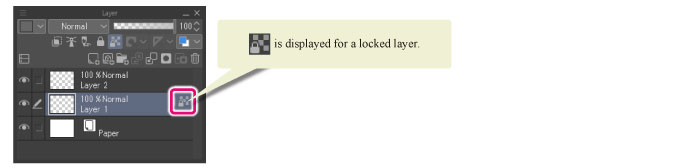
Select the [Layer] menu > [Layer settings] > [Lock Layer] to lock the selected layer. Locked layers cannot be drawn on or edited.
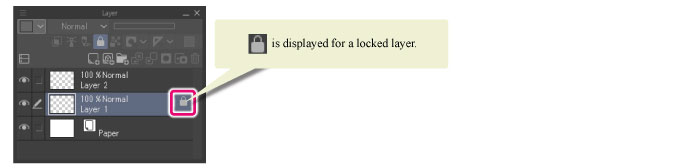
|
|
Select the [Layer] menu > [Layer settings] > [Lock Layer] again to unlock the selected layer. |
Lock transparent pixels
Select the [Layer] menu > [Layer settings] > [Lock transparent pixels] to lock transparent pixels on the selected layer. Allows you to draw on already drawn areas without going out of the drawn area.
Show Layer
Select the [Layer] menu > [Layer settings] > [View Layer] to view or hide the selected layer. An eye icon is shown on the [Layer] palette next to layers that are visible.
Change Layer Name
Allows you to rename the selected layer.
1On the [Layer] palette, select the layer you want to rename.

2Select the [Layer] menu > [Layer Settings] > [Change Layer Name].
3Enter the new name in the [Change Layer Name] dialog box then, click [OK] to change its name.

4Changes the name of the selected layer to the name set in the dialog box.

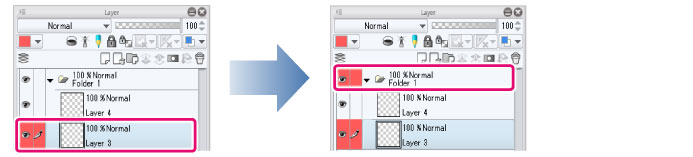
Display palette colors in parent folder [PRO/EX]
When a palette color is specified for a layer, the specified color will also be shown by the parent layer folder.
Select the layer with a specified palette color, then go to the [Layer] menu > [Layer Settings] > [Display palette colors in parent folder] to toggle whether the palette color is shown.
|
|
·If the parent folder is already showing the palette color of a higher layer than the selected layer, the palette color will not be shown by the parent folder. ·For details on how to change the palette color, see "Functions of Layer Palette". |
Display palette colors on canvas [PRO/EX]
Select the [Layer] menu > [Layer Settings] > [Display palette colors on canvas] to fill the canvas with the specified palette color.
The palette color will be shown at half the opacity of the layer itself. If the opacity of the layer is changed, the opacity of the palette color will adjust accordingly.
The displayed palette color will not appear in exported files.
|
|
·If you hide the layer or select a frame in the [Timeline] palette that does not include the layer, the palette color will be hidden. ·For details on how to change the palette color, see "Functions of Layer Palette". |
Advanced Settings
Select the [Layer] menu > [Layer Settings] > [Advanced Settings] to edit settings for tonal correction layers and fill layers.
·When selecting a tonal correction layer, a dialog box for editing tonal correction effects will appear.
·When selecting a fill layer, the [Color settings] dialog box will appear.
|
|
·For details on the dialog box for tonal correction, see "New Correction Layer [PRO/EX]". ·For details on the [Color settings] dialog box, see "Advanced settings of color Dialog Box". |