


Sub tool Palette Menu
The following describes the functions included in the menu that displays when you click [Palette menu] on the upper left corner of the [Sub tool] palette.
|
|
Some menu items can be run from the context menu that displays when you right click the mouse. |

Settings of sub tool group
Displays the [Settings of sub tool group] dialog box where you can set a name for the sub tool.

Duplicate sub tool
Displays the [Duplicate sub tool] dialog box to copy the currently selected sub tool.
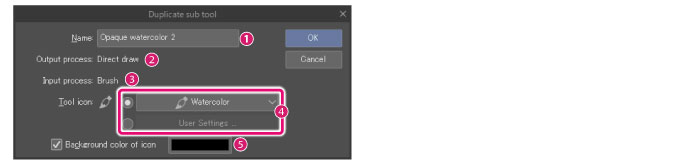
[Duplicate sub tool] Dialog Box
|
(1) Name |
Input a name for the sub tool. |
|
(2) Output process |
Displays the output process of the currently selected sub tool. |
|
(3) Input process |
Displays the input process of the currently selected sub tool. |
|
(4)Tool icon |
Specify the icon to display on the [Tool] palette when the sub tool is selected. Switch a setting to [User settings] to display a file selection dialog that allows you to select an image file to use as an icon. |
|
(5)Background color of icon |
Set the background color for the icon to display on the [Tool] palette when the sub tool is selected. Clicking the color indicator displays the [Color settings] dialog box. |
|
|
·For details on [Output process] and [Input process], see "Input Process and Output Process of Sub Tools". ·Acceptable file formats for [Tool icon] → [User settings] are: BMP, JPEG, PNG, TIFF and Targa. ·For details on the [Color settings] dialog box, see "Advanced settings of color Dialog Box". |
Settings of sub tool
Displays the [Settings of sub tool] dialog box where you can edit the name of the currently selected sub tool.
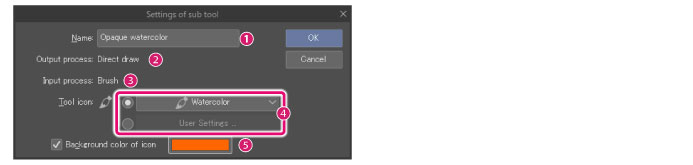
Sub tool settings dialog
|
(1) Name |
Input a name for the sub tool. |
|
(2) Output process |
Displays the output process of the currently selected sub tool. |
|
(3)Input process |
Displays the input process of the currently selected sub tool. |
|
(4)Tool icon |
Specify the icon to display on the [Tool] palette when the sub tool is selected. Switch a setting to [User settings] to display a file selection dialog that allows you to select an image file to use as an icon. |
|
(5)Background color of icon |
Set the background color for the icon to display on the [Tool] palette when the sub tool is selected. Clicking the color indicator displays the [Color settings] dialog box. |
|
|
·For details on [Output process] and [Input process], see "Input Process and Output Process of Sub Tools". ·Acceptable file formats for [Tool icon] → [User settings] are: BMP, JPEG, PNG, TIFF and Targa. ·For details on the [Color settings] dialog box, see "Advanced settings of color Dialog Box". |
Delete sub tool
Deletes the currently selected sub tool.
Create custom sub tool [PRO/EX]
Displays the [Create custom sub tool] dialog box to add the current settings on the [Tool Property] palette as a new sub tool.
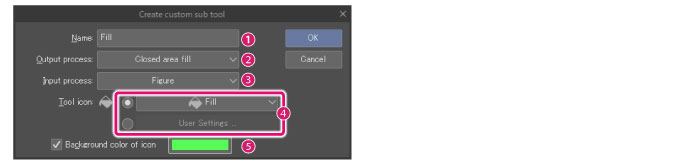
[Create custom sub tool] Dialog Box
|
(1) Name |
Input a name for the sub tool. |
|
(2) Output process |
Set an output process for the sub tool. |
|
(3)Input process |
Set an input process for the sub tool. |
|
(4) Tool icon |
Specify the icon to display on the [Tool] palette when the sub tool is selected. Switch a setting to [User settings] to display a file selection dialog that allows you to select an image file to use as an icon. |
|
(5)Background color of icon |
ConSet figure the background color for the icon to display on the [Tool] palette when the sub tool is selected. Clicking the color indicator displays the [Color settings] dialog box. |
|
|
·For details on [Output process] and [Input process], see "Input Process and Output Process of Sub Tools". ·Acceptable file formats for [Tool icon] → [User settings] are: BMP, JPEG, PNG, TIFF and Targa. ·For details on the [Color settings] dialog box, see "Advanced settings of color Dialog Box". |
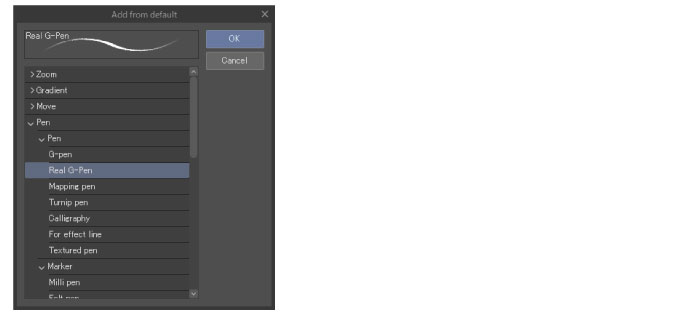
Add from default
This opens the [Add from default] dialog box, where you can add tools to the initial settings. If you delete a sub tool from the initial settings, you can add it back here.
Select a sub-tool to from [Add from default] dialog box and select [OK] to add the selected tool to the [Sub Tool] palette.
|
|
Sub tools added from the [Add from default] dialog box will be added to the currently selected sub tool group. |
Lock [PRO/EX]
Saves the values set on the [Tool Property] palette to the currently selected sub tool. When locked, the settings on the [Tool Property] palette can be changed but when the same sub tool is selected again, the settings are restored to those at the time of [Lock].
|
|
Locked sub tools are displayed on the [Sub tool] palette with a [Lock] icon. |
Reset to default
Resets the settings on the [Sub tool] palette and restores the selected sub tool settings to their initial values.
Save as default
Registers the settings on the [Sub tool] palette as the initial settings for the selected sub tool.
Modifier key settings [PRO/EX]
Opens the [Modifier Key Settings] dialog box where you can set modifier keys for the selected sub tool.
|
|
For details on the [Modifier Key Settings] dialog box, see "Modifier key settings [Windows] [PRO/EX]". |
Import sub tool [PRO/EX]
Sub Tool Files (extension: .sut) and Photoshop brush files (extension: .abr) can be imported and registered to the [Sub Tool] palette. When using Windows/macOS, IllustStudio and ComicStudio tool sets (extension: .tos) can also be imported.
|
|
When using Android/Macs with Apple M1 chips, IllustStudio and ComicStudio tool sets (extension: .tos) cannot be imported. |
|
|
·Sub tool files (extension: .sut) and IllustStudio and ComicStudio tool sets (extension: tos) can also be imported to the [Sub tool] palette using drag and drop. ·When Photoshop brush files with multiple brush settings are imported, a sub tool group will be added to the [Sub Tool] palette. |
Export sub tool [PRO/EX]
Exports (saves) the selected [Sub Tool] to a sub tool file (extension: sut).
Register sub tool as material [PRO/EX]
Displays the [Material property] dialog box to register the selected sub tool in a [Material] palette.
|
|
·A sub tool can also be registered as material by dragging and dropping the selected sub tool to a [Material list] on the [Material] palette. When registered in this way, the [Material property] dialog box does not display. ·Sub tools registered to the [Material] palette can be uploaded to the CLIP server using the included portal application, CLIP STUDIO. For details on uploading methods, please see Clip Studio TIPS. ·Clip Studio can be started from the [File] menu ([CLIP STUDIO PAINT] menu on macOS and Tablet) > [Open CLIP STUDIO]. For the Smartphone, select [Menu] > [Usage / Material / Work / Support]. |
[Material property] Dialog Box
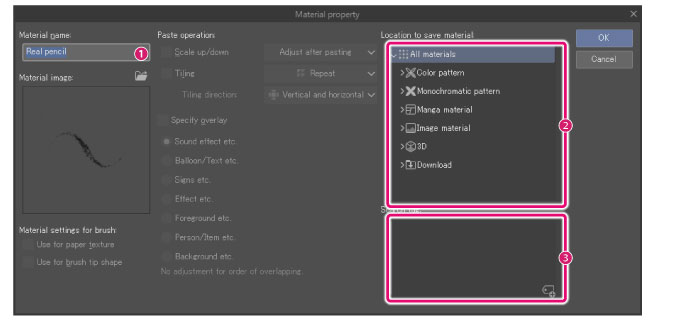
(1) Material name
Input a name for the material.
(2) Location to save material
Click a folder to specify the location to save the material. The specified location is applied to the [Tree view] on the [Materials] palette.
(3) Search tag
Click the tag list and specify a search tag displayed in the [Tag list].
Clicking the tag with a + sign in the lower right will allow you to create a new tag.
Import sub tool material
The [Import sub tool material] dialog is displayed and sub-tool materials downloaded from CLIP STUDIO ASSETS are imported.
By selecting the sub-tool material to load from the [Sub Tool List], and clicking [OK], the sub tool material is loaded into the [Sub Tool] palette.
[Import sub tool material] dialog box
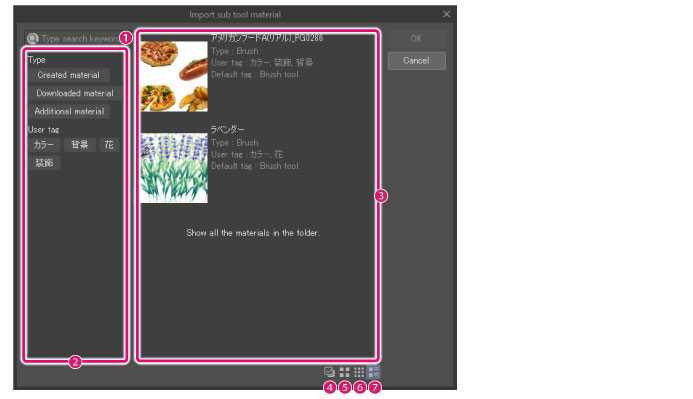
(1) Search box
Enter keywords and search for sub tool materials.
(2) Tag list
A list of tags assigned to materials displayed as buttons. When clicking the button, the sub-tool material with the specified parameter is displayed in the [Sub tool List].
(3) Sub Tool List
Display sub tool materials downloaded from CLIP STUDIO ASSETS in a list.
(4) Show item checkbox
A checkbox is displayed for each thumbnail of the sub tool materials displayed in the [Sub Tool List]. You can select a material by turning on the checkbox.
(5) Thumbnail [Large]
The thumbnail of the sub tool materials displayed in the [Sub Tool List] is displayed large.
(6) Thumbnail [Small]
The thumbnail of the sub tool materials displayed in the [Sub Tool List] is displayed small.
(7) Thumbnail [Detail]
In addition to thumbnails of the sub tool materials displayed in the [Sub Tool List], information on the sub tool materials is displayed.
View
Set how to display each sub tool button.
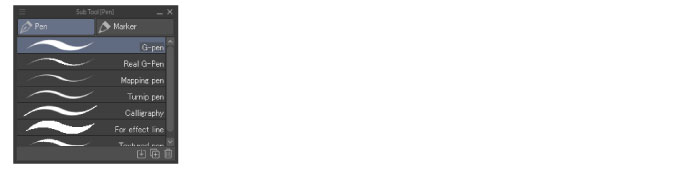
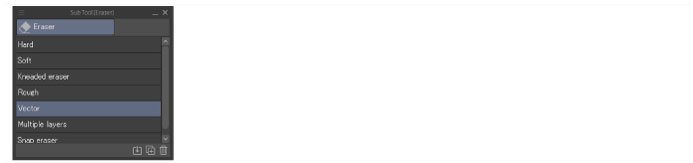
Stroke
Displays sub tool buttons as strokes. Strokes can be used only for drawing tools such as pen and brush. For others, a text is displayed.
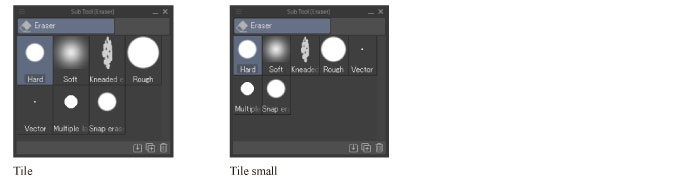
Tile/Tile small
Displays sub tool buttons as tiles. Tiles come in two sizes.
Text
Displays the sub tool buttons using text.
Show group name of sub tool
When turned on, displays the sub tool group name next to the [Switch group] icon.

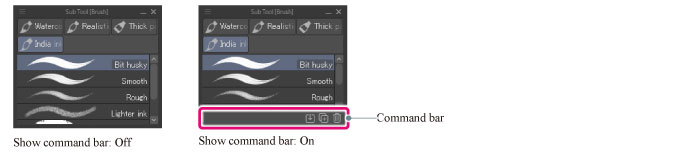
Show command bar
When turned on, the command bar is displayed on the [Sub tool] palette.
Change Order
The icon order method can be selected in [Tool Group] in [Sub Tool] on the [Sub Tool] palette.
|
Drag |
The sub tool and tool group layout on the palette can be changed by dragging the icons. |
|
Ctrl + drag |
The sub tool and tool group layout on the palette can be changed by dragging the icons while holding down Ctrl. |
Hide sub tool palette
Hides the [Sub tool] palette.
|
|
To show the [Sub Tool] palette again, select the palette from the [Window] menu > [Sub Tool]. If you are using a Smartphone, tap the icon on the palette bar. |