


Set the head bone position
Set the head and neck bones of the 3D character.
1Change the bone settings
Click [Set head bone position] in the [Navigation area].

The [Preview area] switches to the screen for setting the head bone.
|
|
To return to the hip settings, click [Set hip bone and model position] in the [Navigation area]. Clicking [Cancel] clears all of the settings configured so far. |
2Set the bone position
Align the position of the bone with the 3D character.

(1) Click the lower bone in the [Preview area].
(2) A manipulator is displayed. Drag the arrows of the manipulator with the mouse cursor to move the entire bone.
(3) Align the position of the bone with the model. The bottom of the center bone should be aligned with the base of the neck.
|
|
For information on how to change the camera angle in the [Preview area], see "Setting Camera Angles" . |
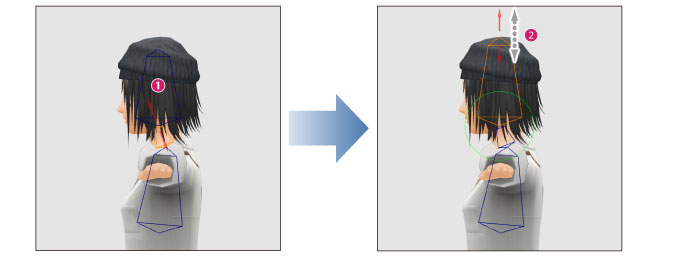
3Set the length of the neck
Set the correct neck bone length for the 3D character.

(1) Click the center bone in the [Preview area].
(2) When the manipulator is displayed over the bone, drag the arrows with the mouse cursor. Match the height of the bone with the 3D character's neck.
4Set the length of the head
Set the correct head bone length for the 3D character.
(1) Click the upper bone in the [Preview area].
(2) When the manipulator is displayed over the bone, drag the arrows with the mouse cursor. Match the height of the bone with the 3D character's head.
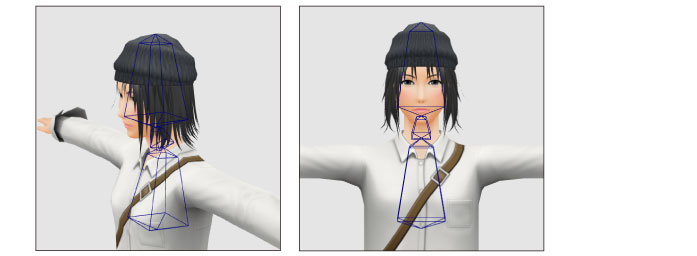
5Check the position of the bones
Change the camera angle and check the position of the bones from various angles.
If any corrections are needed, readjust the bone positions in the [Preview area].
Next, proceed to "Set the arm bone position" .